Printing/Scanning via USB Storage
1. Connect USB Device (Stick)
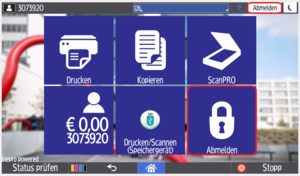
Connect your USB storage device (USB-A) to the USB port at the top left next to the display. The device will then be read. During the reading process, a USB symbol will blink at the bottom of the display. Once it stops blinking, the USB device is successfully connected. You can now click on "Print/Scan (Storage Device)".
Note: Use a USB stick formatted in FAT16 or FAT32 format.
3a. Print from Storage Device
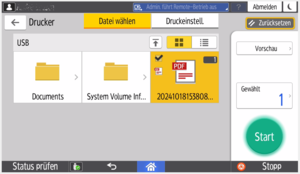
You will now see the directories and documents on the storage device. Select the document you want to print. Multiple selections are also possible. Under "Print Settings", you can adjust the print settings (color, double-sided, finishing). By pressing "Start", you will print the selected documents.
3b. Scan to Storage Device
If you have selected "Scan to Storage Device", you can now choose where the scanned document should be saved (storage location). Under "Scan Settings", you have the option to set the resolution, adjust the file name, or select the type of original (e.g., double-sided). Press "Start" to begin the scanning process.
5. Don't Forget to Log Out!
Important: Don't forget to log out! You can do this using the logout button at the top right or the home icon at the bottom of the start screen. Your remaining balance will only be re-credited to your StudentCard/MensaCard upon logging out. Therefore, the card must not be removed from the reader during the entire copying/printing process.
If you happen to forget to log out...
If you did not log out and your balance was not re-credited to your StudentCard/MensaCard, simply place the card on the reader again. The balance remains in the system until you log in again at one of the printing devices. It does not have to be the same device you last used.
The balance that was not re-credited will be loaded back onto the card when you place the card on the reader again. If, in the meantime, you have added more credit, both balances will be combined. You will then see the message: "Transaction successfully completed. Remaining credit: XX,XX €". You can now remove the card from the reader. By placing it on the reader again, you can use the device with the available balance. Don't forget to log out!


