Printing/Scanning via USB Storage
1. Connect USB Device (Stick)
You can connect USB storage devices (USB-A) at the top left. The device will then be read. During the reading process, a USB symbol will blink at the bottom of the display. Once it stops blinking, the USB device is successfully connected. You can now click on "Print/Scan (Storage Device)".Note: Use a USB stick formatted in FAT16 or FAT32 format.
3a. Print from Storage Device
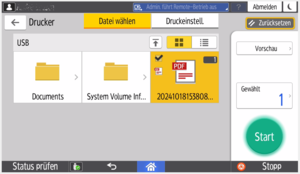
You will see the directories and documents on the storage device. When you click on the document to print, it will be selected. You can choose more than one document. Under "Print Settings", you have the option to adjust the print settings for the selected documents (color, double-sided, finishing). Press "Start" to print the selected documents according to the settings.
3b. Scan to USB
If you have selected "Scan to Storage Device," you can now choose where the scanned document should be saved (storage location). Under "Scan Settings", you have the option to set the resolution for scanning, adjust the file name, and select the type of original (e.g., double-sided). Press "Start" to begin the scanning process.
4. Safely Remove USB
To safely remove the USB device and prevent data loss, press the USB icon at the bottom of the display. You will then have the option to confirm the process. The device will notify you when it's safe to unplug the USB device.
Please don't forget to log out if you no longer wish to use the printing system.


