Configure a VPN connection on Linux using openconnect
It is strongly recommended not to run any other VPN clients at the same time
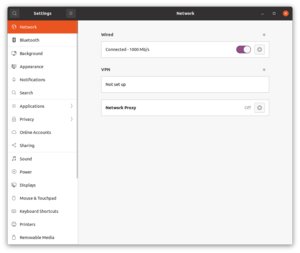
Step 4: Configure VPN type
In the new dialog box, please enter the following information:
Name: HTW-Berlin (arbitrary)
VPN Protocol: 'Cisco AnyConnect or openconnect' (preselected)
Gateway: 'vpncl.htw-berlin.de'
CA Certificate: Please select the certificate 'T-TeleSec_GlobalRoot_Class_2.pem'.
Typically, this certificate should be preinstalled in the following folder: '/etc/ssl/certs/'.
Afterwards, please confirm your entries by clicking 'Add' in the upper right corner.
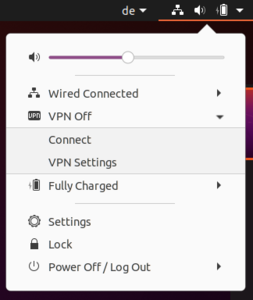
Step 6: Entering credentials and connect
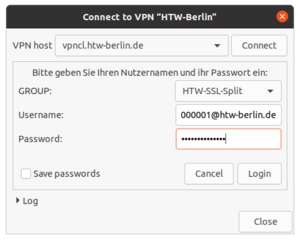
In the dialog box 'Connect to VPN', you can now log on to the VPN server of the HTW-Berlin.
Please select "SSL-VPNCL-HTW" as the VPN host.
Afterwards, click on the Connect button right next to it.
Please enter your HTW account credentials now. Don't forget to add the extension „@htw-berlin.de” to your username (for example: s0000001@htw-berlin.de or amuster@htw-berlin.de).
For using the VPN service, you can choose between two different connection profiles (GROUP):
HTW-SSL-Split (default)
Only queries, which are which are adressed to the the unversity network (for example: services of your faculty), will be transmitted via the VPN tunnel. Queries addressed to external providers (for example: accessing the web page wikipedia.org) will still be served using your regular internet service provider.
HTW-SSL-VPN-Full
The complete internet traffic gets routed trough the VPN server of the university. That means, that you are using an IP address of the university as long as the VPN connection is established (141.45.*.*) This is necessary for all those services of the HTW, which access the resources of additional service provides (for example: library, ebooks).
Afterwards, please click on the Login button.


